
Sprouting beans is really fun! You can make raw hummus with sprouted chickpeas, as well as raw white and black bean hummus. Below are the simple directions I follow in order to sprout my own beans. If you want an idea for a raw hummus recipe, check out my Raw Chickpea Hummus!
Step 1: First of all, it is not necessary to buy a fancy $30 sprouting jar! You can use any large glass jar, and it doesn’t even need a top! I save a lot of old glass jars, so if you have some laying around your house, this is the perfect time to use them! I use an old instant coffee jar and an old large honey jar.
For the jars, if they have plastic tops and you want to designate these as official sprouting jars, take the plastic tops, and stab holes in them with a knife:

Make sure you don’t make the holes too big, or else the beans will fall out
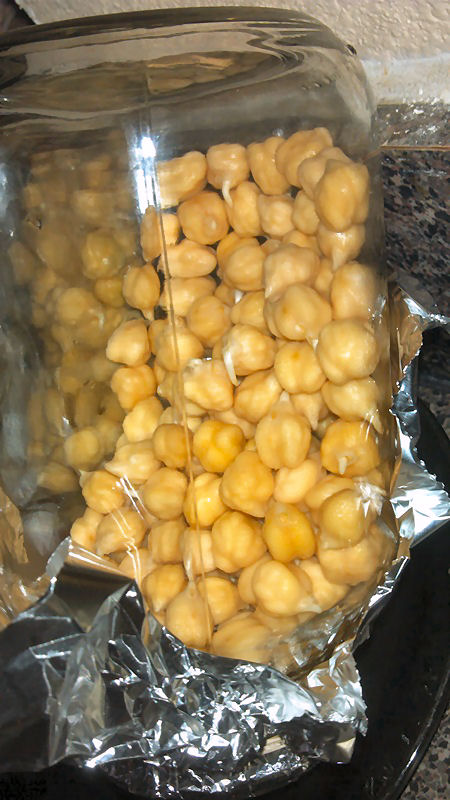
If the jars have metal tops, then all you need is a piece of mesh, a cheesecloth, nut cloth, or…tin foil (this is not recommended for health reasons, but I have used it and it works fine once in awhile)! Place the tin foil/mesh over the jar in replace of the metal lid cover, secure it with a rubberband, and poke tiny holes into it as well.
We are now ready for sprouting!
Step 2: Place 1 cup raw, dried chickpeas in the jar, with 2 cups water. You can increase the amount all you want, but you want to use 2 parts water to 1 part chickpeas. Keep in mind that you do not want to fill the jar with chickpeas completely, as you need to give the beans room for air, expanding and sprouting, so packing them in is not recommended. Fill the jar up with water and leave them to soak overnight (or about 8 to 10 hours).
Step 3: In the morning, you should notice that the chickpeas expanded a ton. This is a good thing. Empty any extra water and rinse out the chickpeas. Turn the jar upsidedown with the rinsed out chickpeas, and cover with your tops. Lean the jars up against the wall at an angle, making sure the chickpeas are dispersed and not all bunched up at the bottom. This gives room for air so that the chickpeas can start sprouting

Step 4: Check on the chickpeas throughout the day, rinsing them out every 8 hours or so. after the first 24 hours (or less sometimes), you should begin to notice little tails growing on them:
DAY ONE
Step 5: On the second day, rinse out the chickpeas again and leave them to sit overnight in the same position, crooked against a wall. In the morning, you should have a significantly larger sprout growing out of the beans:

DAY TWO
Step 6: Congratulations, you have successfully sprouted chickpeas! Take them out of the jar, rinse them one final time, and store the beans in a container in the fridge. You can now make raw chickpea hummus, add them to salads or eat them plain just like that! Try it, they taste great, sweet and crunchy!

Let’s go make raw hummus now!
Side note: Do not leave the chickpeas sprouting longer than 3 days. The beans will turn rancid and you will have to throw them out. I did this as an experiment to see how long I could grow the sprouts, and turns out that was a very bad idea. Two days is the recommended time for sprouting chickpeas!

This looks awesome, can I do it with canned chickpeas? or do they need to be special ones? 🙂
They have to be dried chickpeas, not canned. Any bag of dried chickpeas in the pasta/rice section at your store works fine! Preferably organic, but it really doesn’t matter that much, as long as it’s not canned! 🙂